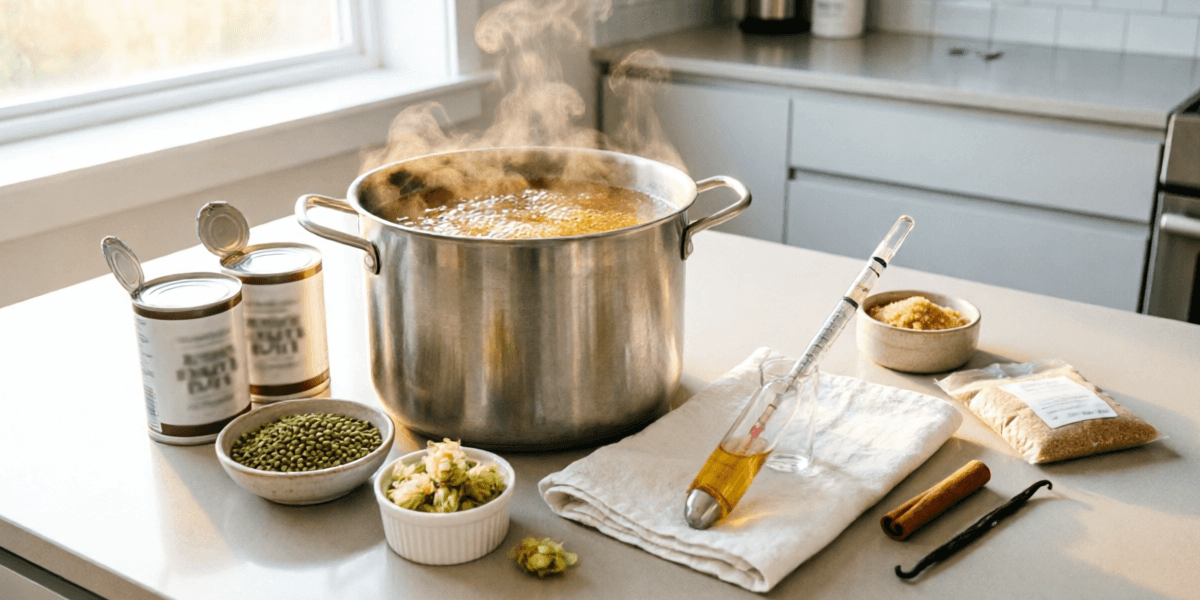
Introduction: Why Extract Brewing?
After more than 15 years of brewing everything from crisp pilsners to Russian imperial stouts - and helping thousands of readers start their own brewing journeys here at BarCarrera - I can say with absolute confidence: extract brewing is the single best entry point into homebrewing. It's not a compromise. It's not a "lesser" method. Some of the most awarded beers in homebrewing competitions have been brewed using extract.
What makes extract brewing so compelling for beginners? It removes the most complex variable in the brewing process - mashing - while still giving you complete creative control over your recipe. You're working with concentrated wort that professional maltsters have already perfected, allowing you to focus on the parts of brewing that matter most: sanitation, fermentation temperature control, and recipe formulation.
In this comprehensive guide, I'll walk you through everything from your very first batch to producing home brewed beer that will make your friends question whether you're secretly buying commercial craft beer. We'll cover equipment, ingredients, step-by-step technique, common pitfalls, and the exact products I recommend based on years of hands-on testing and reader feedback.
"The best brewing method is the one you'll actually do consistently. Extract brewing lets you brew great beer tonight, this weekend, and every weekend after - without a $1,000 equipment investment."
- John Carrera
What Is Extract Brewing?
Extract brewing is a homebrewing method where you use pre-made malt extract - either in liquid (LME) or dry (DME) form - as the base fermentable sugar source for your beer. Instead of mashing raw grains yourself to convert starches into sugars (as in all-grain brewing), you start with extract that's already been converted by a professional maltster.
Think of it this way: if all-grain brewing is like making pasta from scratch (mixing flour, eggs, kneading, rolling, cutting), extract brewing is like using high-quality store-bought pasta. You're still the chef - you choose the sauce, the seasonings, the cooking technique. You just skip the most labor-intensive step.
Types of Extract Brewing
- Extract-only brewing: Using only malt extract and hops. The simplest approach, perfect for your very first batch.
- Extract with specialty grains: Steeping crushed specialty grains (like crystal malt, chocolate malt, or roasted barley) in hot water before adding extract. This adds complexity, color, and flavor without requiring a full mash.
- Partial mash: Combining a small grain mash with extract to supplement fermentables. A stepping stone toward all-grain brewing.
For home brewing beginners, I strongly recommend starting with extract with specialty grains. The additional 20 minutes of steeping adds tremendous flavor complexity and teaches you fundamental grain knowledge that will serve you well if you eventually move to all-grain brewing.
Extract Brewing vs. All-Grain: The Honest Comparison
Let me address the elephant in the room. Many experienced homebrewers will tell you extract beer "isn't as good" as all-grain. This is largely a myth. Here's the reality:
| Factor | Extract Brewing | All-Grain Brewing |
|---|---|---|
| Equipment Cost | $100-$150 | $300-$800+ |
| Brew Day Length | 2-3 hours | 5-8 hours |
| Skill Level | Beginner-friendly | Intermediate-Advanced |
| Recipe Flexibility | High (with specialty grains) | Maximum |
| Beer Quality Potential | Excellent (competition-winning) | Excellent (competition-winning) |
| Space Required | Kitchen-friendly | Garage/outdoor preferred |
| Consistency | Very consistent batch-to-batch | More variables to manage |
The truth is, poor all-grain beer is far more common than poor extract beer. The margin for error in all-grain brewing is smaller, and beginners who jump straight to all-grain often become frustrated and quit. Extract brewing builds confidence and fundamental skills that translate to any brewing method.
DME vs. LME: Understanding Malt Extracts
One of the first decisions you'll face is choosing between Dry Malt Extract (DME) and Liquid Malt Extract (LME). Both are excellent products, but they have distinct characteristics that make each better suited for different situations.
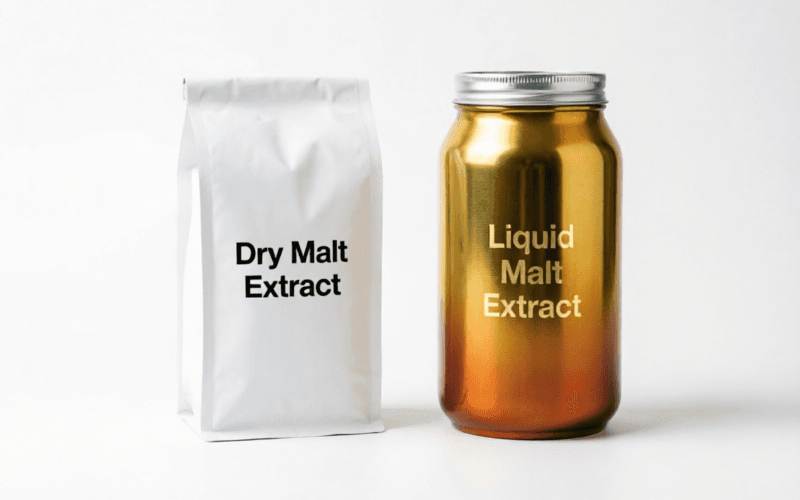
DME (left) and LME (right) - both excellent choices for extract brewing
| Characteristic | DME (Dry Malt Extract) | LME (Liquid Malt Extract) |
|---|---|---|
| Moisture Content | ~2% | ~20% |
| Shelf Life | 12-24 months (sealed) | 6-12 months (sealed) |
| Storage | Cool, dry place; resealable | Cool place; use quickly after opening |
| Measurement | Easy (weigh on scale) | Tricky (sticky, hard to pour) |
| Flavor Profile | Clean, neutral | Slightly richer, more caramel notes |
| Color Stability | Excellent (doesn't darken) | Darkens over time with age |
| Potential (PPG) | ~44 points/lb/gal | ~36 points/lb/gal |
| Cost per Point | Slightly higher | Slightly lower |
| Dissolving | Can clump if added to cold water | Dissolves easily but can scorch |
My Recommendation for Beginners
Start with DME. Here's why: it's easier to store, measure, and it stays fresh longer. When you're learning, you don't want to worry about your extract going stale or darkening. DME gives you the most consistent results with the least hassle. As you gain experience, you can experiment with LME for specific styles where its richer character shines - like Scottish Ales or English Bitters.
Pro tip: If you do use LME, warm the can in a bowl of hot water for 10 minutes before opening. This makes it flow much more easily and ensures you get all the extract out of the can.
Essential Extract Brewing Equipment Guide
Here's where many homebrew beginners get overwhelmed - and overspend. Let me simplify this for you. You need a focused set of equipment, and I'll tell you exactly what matters and what you can skip.
The Non-Negotiable Equipment List
- Brew Kettle (8-10 gallon): You need at least a 5-gallon capacity for partial boils, but an 8-10 gallon kettle gives you room for full-volume boils (the gold standard for extract brewing). Look for heavy-gauge stainless steel with a thick, encapsulated bottom.
- Fermentation Vessel (6.5 gallon): A food-grade plastic bucket or glass carboy. I'll compare these in detail below.
- Auto-Siphon with Tubing: For transferring beer between vessels without disturbing sediment. Much easier and more sanitary than a racking cane.
- Bottling Bucket with Spigot: Makes adding priming sugar and filling bottles dramatically easier.
- Bottle Capper & Caps: If you're bottling (most beginners start here). A twin-lever capper is more forgiving than a bench capper.
- Hydrometer: Measures specific gravity to track fermentation progress and calculate ABV. Essential.
- Thermometer: Digital instant-read for mash temps, or a simple dial thermometer for monitoring boil and fermentation temps.
- Sanitizer (Star San): The single most important "ingredient" in your beer. No-rinse acid-based sanitizer that's the industry standard.
- Brewing Spoon (long): Stainless steel, at least 24 inches. You need to stir a full kettle.
- Timer & Notebook: Track your boil additions, temperatures, and observations. Every batch teaches you something.
Fermentation Vessel Deep Dive
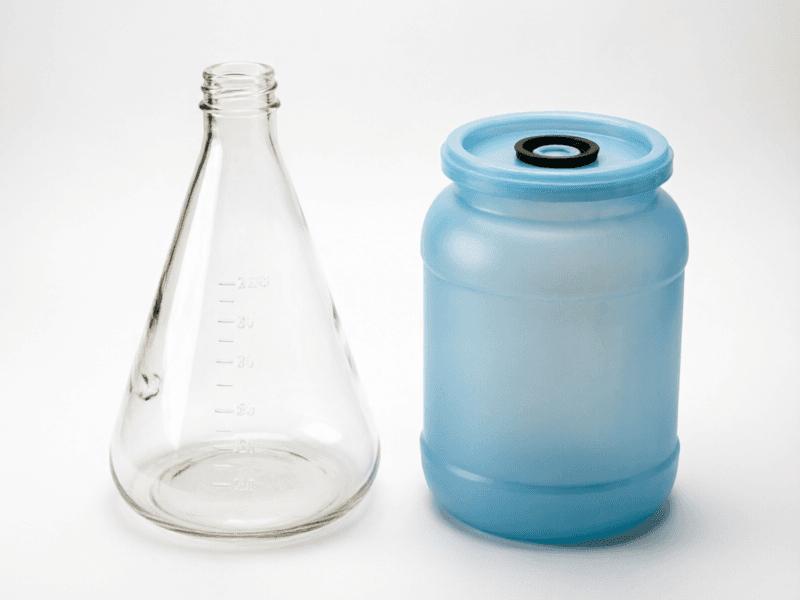
Glass carboy (left) vs. plastic bucket fermenter (right) - each has distinct advantages
Glass Carboy Pros
- • Non-porous - won't absorb flavors or odors
- • Scratch-resistant - easier to sanitize thoroughly
- • Oxygen impermeable - no oxidation risk
- • You can see fermentation activity
- • Lasts decades with proper care
Glass Carboy Cons
- • Heavy and fragile - dangerous if dropped
- • Hard to clean interior without specialized brushes
- • Cannot add ports, valves, or fittings
- • More expensive ($30-$50)
- • Difficult to see sediment/trub clearly
Plastic Bucket Pros
- • Lightweight and virtually unbreakable
- • Wide mouth - easy to clean by hand
- • Can drill holes for fittings/thermowells
- • Affordable ($15-$25)
- • Stackable for storage
Plastic Bucket Cons
- • Scratches harbor bacteria over time
- • Slightly oxygen-permeable (minimal for primary)
- • Can absorb strong flavors if not cleaned well
- • Need to replace every 2-3 years
- • Can't see fermentation activity
My pick for beginners: Start with a food-grade plastic bucket with a gasketed lid. It's forgiving, easy to clean, and affordable. Upgrade to glass (or better yet, a conical like the FermZoon or Speidel) once you're committed to the hobby.
Extract Brewing Ingredients Deep Dive
Extract brewing requires just four core ingredients, but understanding each one deeply will dramatically improve your beer. Let me break down what matters.
1. Malt Extract (Your Base)
As discussed above, choose between DME and LME. Key considerations:
- Freshness matters enormously. Old extract produces "cardboard" or "sherry-like" off-flavors from oxidation. Buy from shops with high turnover (Northern Brewer, MoreBeer, or your LHBS).
- Color selection: Pale/light extract is the most versatile. Amber, dark, and wheat extracts are available for specific styles.
- Hopped vs. unhopped: Most quality extract is unhopped, giving you full control over your hop schedule. Avoid pre-hopped extract kits (like Coopers) if you want to learn proper technique.
2. Hops (Bitterness, Flavor & Aroma)
Hops contribute bitterness (added early in the boil), flavor (added mid-boil), and aroma (added late or at flameout). For beginners:
- Start with versatile hops: Cascade (American pale ales), Centennial (IPAs), Saaz (lagers/European styles), or East Kent Goldings (English ales).
- Store properly: Keep hops sealed in vacuum bags in the freezer. They degrade rapidly when exposed to oxygen and warmth.
- Understand alpha acids: Higher AA% means more bitterness per ounce. Your recipe will specify the AA% - adjust quantities if your hops differ.
3. Yeast (The Real Brewer)
Yeast converts sugar into alcohol and CO₂, but it also produces hundreds of flavor compounds. This is where many beginners under-invest.
- Dry yeast: Convenient, affordable, and increasingly excellent quality. Fermentis Safale US-05 (American ale), S-04 (English ale), and Nottingham are all reliable choices.
- Liquid yeast: Wider strain selection from Wyeast and White Labs. Better for specific style accuracy. Requires a starter for best results with lower cell counts.
- Pitch rate matters: Under-pitching is one of the most common beginner mistakes. For a 5-gallon batch of average gravity ale, you need roughly 100-150 billion cells. One packet of dry yeast (11g) typically provides this.
4. Water (Often Overlooked)
For extract brewing, your water needs are simple: use clean, chlorine-free water. If your tap water tastes good, it will make good beer. If you have chlorinated municipal water, either use a carbon filter or buy bottled spring water. Avoid distilled or reverse-osmosis water for extract brewing (you need some minerals).
Step-by-Step Extract Brewing Process for Beginners
Here's the complete extract brewing process, from setup to bottling. I've refined this method over hundreds of batches to be both effective and efficient.
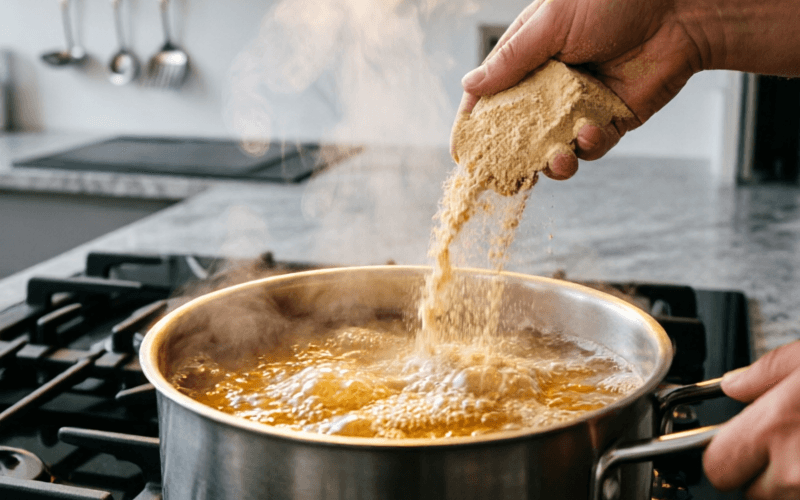
Adding malt extract to the boil - a critical step in extract brewing
Sanitize Everything (30 min before brew day)
Prepare your sanitizer solution (Star San at 1 oz per 5 gallons of water). Sanitize your fermentation bucket, lid, airlock, spoon, thermometer, hydrometer test jar, and anything else that will touch your beer post-boil. Clean first, then sanitize - these are two different steps.
Heat Your Strike Water (15 min)
Heat 2.5-3 gallons of water to 155-165°F for steeping specialty grains (if using). If doing a partial boil, heat your full boil volume (2.5-3 gallons). For full-volume boils, heat all 5 gallons.
Steep Specialty Grains (20-30 min)
Place crushed specialty grains in a mesh bag and steep in the hot water (150-160°F) for 20-30 minutes. Do NOT let it reach a boil - you are extracting color and flavor, not converting starches. Remove the bag and let it drain naturally. Don't squeeze it (this can extract tannins).
Bring to a Boil & Add Extract (45-60 min)
Bring your wort to a rolling boil. Remove from heat before adding extract to prevent scorching. Stir in your DME or LME completely, then return to heat. Start your 60-minute boil timer. Add hops according to your recipe schedule (bittering hops at 60 min, flavor at 15-30 min, aroma at 0-5 min).
Cool the Wort (20-30 min)
After the boil, you need to cool your wort to yeast-pitching temperature (65-72°F for ales) as quickly as possible. Options: immersion chiller (best), ice bath in sink (works for partial boils), or no-chill method (for advanced users). Speed matters - the longer wort sits between 80-130°F, the more vulnerable it is to contamination.
Transfer & Pitch Yeast
Transfer cooled wort to your sanitized fermenter. If doing a partial boil, add cold water to reach 5 gallons total. Aerate vigorously by splashing/pouring from height for 2-3 minutes (yeast needs oxygen at this stage). Then pitch your yeast. Seal with lid and attach airlock filled with sanitizer or vodka.
Ferment (1-2 weeks)
Store in a dark, temperature-stable location. Ideal ale fermentation: 65-72°F. Active fermentation typically shows bubbling within 12-24 hours. Allow 1-2 weeks for complete fermentation and conditioning.
Bottle & Condition (2+ weeks)
When final gravity is stable for 2-3 consecutive days, it's time to bottle. Dissolve 3/4 cup corn sugar (dextrose) in 2 cups of boiling water, add to bottling bucket, then siphon beer on top. Fill bottles, cap, and store at room temperature for 2 weeks minimum for carbonation. Then refrigerate and enjoy!
Extract Brewing Fermentation Mastery
I cannot overstate this: fermentation temperature control is the single most impactful thing you can do to improve your beer. More off-flavors in homebrew come from poor fermentation temperatures than from any other source. Period.
Temperature Guidelines by Style
| Beer Style | Ideal Fermentation Temp | Yeast Strain Example |
|---|---|---|
| American Pale Ale / IPA | 65-68°F | US-05 / WLP001 |
| English Bitter / Stout | 66-70°F | S-04 / WLP002 |
| Belgian Ale | 68-75°F | T-58 / WLP550 |
| Wheat Beer (Hefeweizen) | 62-70°F | WLP300 / WY3068 |
| Lager (if fermenting ale-style) | 50-55°F | W-34/70 (requires cold) |
Simple Temperature Control Solutions
- Basement or interior closet: Usually 5-10°F cooler than room temperature. Great starting point.
- Swamp cooler method: Place fermenter in a tub of water with a wet t-shirt draped over it and a fan blowing. Evaporative cooling drops temps 5-10°F.
- Inkbird temperature controller + chest freezer: The gold standard for home temperature control (~$150 total). Set it and forget it.
- Insulated fermenter wraps: Products like the Brew Belt or FermWrap provide gentle heating for cold environments ($20-$30).
Common Extract Brewiing Mistakes to Avoid
In my years of reviewing reader submissions and troubleshooting batches, these are the mistakes I see again and again. Avoid these and you're already ahead of 80% of homebrewing beginners.
Mistake #1: Poor Sanitation
The #1 cause of bad beer. "Clean" is not the same as "sanitized." You must first clean (remove visible soil with PBW or OxiClean), then sanitize (kill microorganisms with Star San). Anything touching your beer after the boil must be sanitized. No exceptions.
Mistake #2: Scorching the Extract
Adding extract to a pot on direct heat causes it to sink, caramelize, and create unpleasant burnt flavors. Always remove the kettle from heat before adding extract. Stir thoroughly, then return to heat.
Mistake #3: Fermenting Too Warm
Active fermentation generates its own heat - often 5-10°F above ambient. If your room is 75°F, your fermenter might be 82°F, producing fusel alcohols (harsh, solvent-like flavors). Aim for the low end of your yeast's temperature range.
Mistake #4: Using Old/Stale Extract
Old extract develops a cardboard/sherry-like oxidation character. Check manufacturing dates when possible. Buy from high-turnover shops. Store sealed extract in the refrigerator for maximum freshness.
Mistake #5: Bottling Too Early
Bottling before fermentation is complete creates bottle bombs (exploding bottles - dangerous!). Always verify final gravity is stable over 2-3 days before bottling. Use a hydrometer, not just the airlock.
Mistake #6: Not Doing a Full Boil
Boiling only 2 gallons and topping up with cold water leads to poor hop utilization, darker color, and concentrated wort that can cause Maillard reactions. If you can manage a full 5-gallon boil, your beer quality will noticeably improve.
Product Recommendations for Extract Brewing
After testing dozens of products over the years and gathering feedback from hundreds of BarCarrera readers, here are my top picks for extract brewing equipment. I've personally used or supervised the use of every product on this list.
Northern Brewer Essential Homebrew Starter Kit
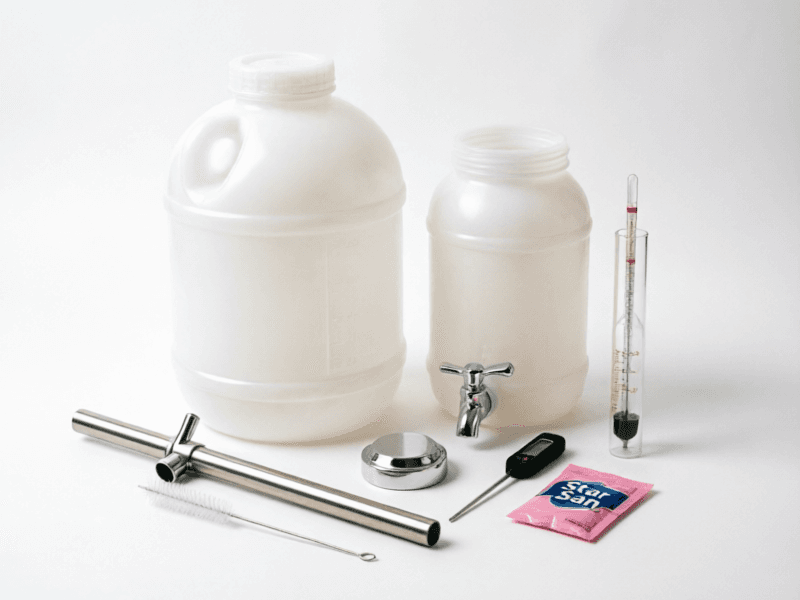
The most complete and well-thought-out beginner kit on the market. Includes a 6.5-gallon fermenting bucket with lid and airlock, 5-gallon bottling bucket with spigot, auto-siphon with tubing, bottle capper, bottle brush, hydrometer, thermometer, and a bottle of Star San sanitizer. Also comes with your first recipe kit.
$109.99 at Northern Brewer
Check Current PriceMoreBeer Deluxe Home Brewing Kit
Wirecutter's top pick and for good reason. This kit includes everything in the standard kit plus a 7.9-gallon fermenter (more headspace), a stainless steel spoon, and a more robust auto-siphon. The larger fermenter means less blow-off during vigorous fermentation. MoreBeer also offers excellent customer support and frequently runs sales.
$139.99 at MoreBeer
Check Current PriceBrewer's Best Essential Homebrew Equipment Kit
Available at many local homebrew shops and online. A solid, no-frills kit that covers all the essentials. The components are slightly less premium than Northern Brewer or MoreBeer, but perfectly functional. Great if you're unsure about committing to the hobby and want to minimize initial investment.
$79.99 at various retailers
Check Current Price
Five Star Star San No-Rinse Sanitizer
The undisputed industry standard for homebrew sanitation. This acid-based, no-rinse sanitizer kills all microorganisms in 30 seconds of contact time. A single bottle makes hundreds of gallons of sanitizer solution. It's foam-positive (helps you see coverage), food-safe, and doesn't need to be rinsed off. If you buy only one "upgrade" product, make it this.
$9.99 for 16 oz bottle
Check Current Price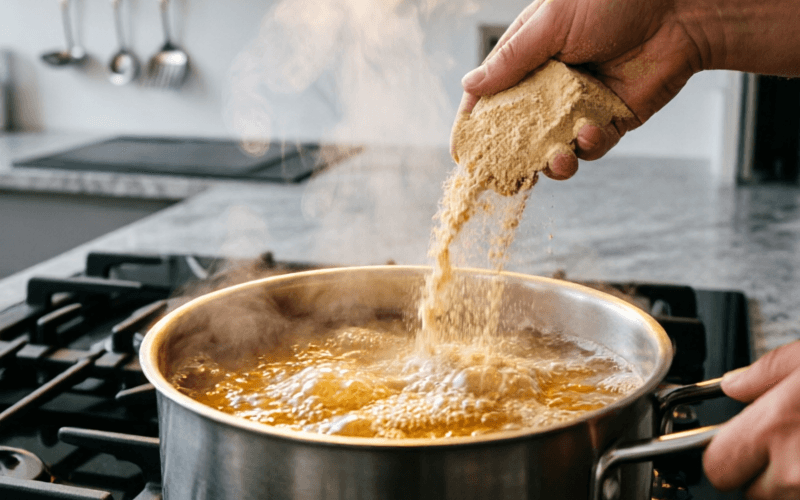
Northern Brewer 8-Gallon Stainless Steel Brew Kettle
Upgrading from a small pot to an 8-gallon kettle is the single biggest quality improvement you can make as an extract brewer. This enables full-volume boils (better hop utilization, lighter color, fewer Maillard reactions). Features a thick encapsulated bottom for even heat distribution, volume markings, and a spigot for easy transfer.
$89.99 at Northern Brewer
Check Current PriceBest Extract Brewing Products & Comparisons
Let me give you a head-to-head comparison of the top starter kits and key extract brewing products so you can make an informed decision based on your budget and goals.
Starter Kit Comparison
| Feature | Northern Brewer Essential | MoreBeer Deluxe | Brewer's Best |
|---|---|---|---|
| Price | $109.99 | $139.99 | $79.99 |
| Fermenter Size | 6.5 gal bucket | 7.9 gal bucket | 6.5 gal bucket |
| Bottling Bucket | ✓ (5 gal) | ✓ (5 gal) | ✓ (5 gal) |
| Auto-Siphon | ✓ (5/16" tubing) | ✓ (3/8" tubing) | ✓ (basic) |
| Hydrometer | ✓ | ✓ | ✓ |
| Thermometer | ✓ (digital) | ✓ (digital) | ✓ (dial) |
| Bottle Capper | ✓ (twin-lever) | ✓ (twin-lever) | ✓ (basic) |
| First Recipe Included | ✓ | ✓ | ✓ |
| Sanitizer Included | ✓ (Star San) | ✓ (Star San) | ✓ (basic) |
| Instructions Quality | Excellent | Excellent | Good |
| Component Quality | Very Good | Excellent | Good |
| Best For | Most beginners | Serious beginners | Budget-conscious |
Brewing Supply Retailer Comparison
| Factor | Northern Brewer | MoreBeer | Midwest Supplies | Local Homebrew Shop |
|---|---|---|---|---|
| Ingredient Freshness | Excellent | Excellent | Good | Excellent (usually) |
| Kit Selection | Very Large | Very Large | Moderate | Varies |
| Pricing | Moderate | Competitive | Moderate | Varies |
| Shipping Speed | Fast | Fast | Moderate | Immediate |
| Customer Support | Excellent | Good | Good | Excellent (personal) |
| Free Shipping Threshold | $59+ | $59+ | $50+ | N/A |
My verdict: For most home brewing beginners, the Northern Brewer Essential Kit offers the best balance of quality, completeness, and price. If you know you're committed and want the extra headspace, the MoreBeer Deluxe is worth the $30 premium. On a tight budget, Brewer's Best gets you brewing without breaking the bank - just plan to upgrade your thermometer and auto-siphon within your first few batches.
Frequently Asked Questions About Extract Brewing
Q: How much does it cost to start extract brewing?
A: A complete starter kit runs $80-$140. Your first ingredient kit (extract, grains, hops, yeast) costs $25-$45. So your total initial investment is roughly $105-$185. Compare this to buying craft beer: at $12-$18 per six-pack, you'll recoup your investment in 3-5 batches. Each subsequent batch costs about $30-$50 in ingredients for 5 gallons (roughly 48 bottles).
Q: Can I brew in an apartment?
A: Absolutely. Extract brewing is apartment-friendly. Use your kitchen stove for partial boils (2.5-3 gallons), or invest in an electric brew kettle for full boils. Many apartment brewers use the "no-chill" method (pouring boiling wort into a sealed HDPE cube) to avoid needing an immersion chiller. Fermentation in a closet or spare room works perfectly.
Q: How long until I can drink my first batch?
A: From brew day to first pour: approximately 3-4 weeks. Brew day takes 2-3 hours. Primary fermentation takes 1-2 weeks. Bottle conditioning (carbonation) takes a minimum of 2 weeks. Some higher-gravity beers benefit from 4-6 weeks of conditioning. Plan accordingly - start your first batch and you'll have beer ready by your next gathering.
Q: Should I start with extract or jump straight to all-grain?
A: Start with extract. I've seen too many enthusiastic beginners buy $500+ of all-grain equipment, get overwhelmed by the complexity, produce mediocre beer, and quit the hobby entirely. Extract brewing teaches you the fundamentals (sanitation, fermentation, recipe reading) in a forgiving format. Once you've brewed 5-10 successful extract batches, you'll know if you want to invest in all-grain - and you'll have the skills to succeed.
Q: What's the best first beer style to brew?
A: An American Pale Ale or Amber Ale. These styles are forgiving of minor mistakes, use widely available ingredients, ferment cleanly at room temperature, and are ready relatively quickly. Avoid IPAs (hop freshness matters enormously), lagers (require cold fermentation), and high-gravity styles (stress yeast) for your first batch.
Q: Do I need to worry about water chemistry for extract brewing?
A: Not for your first several batches. Simply use clean, chlorine-free water. Once you're comfortable with the basics, you can explore water chemistry adjustments (adding gypsum, calcium chloride, etc.) to enhance specific styles. But this is an optimization, not a requirement. Good water is sufficient for excellent extract beer.
Extract Brewing Guide - Conclusion & Next Steps
Extract brewing is not a stepping stone - it's a legitimate, respected brewing method that produces outstanding beer. Some of the best homebrewers I know still brew extract when they want a quick, reliable batch. The skills you develop here - sanitation discipline, temperature control, recipe comprehension, patience - are the same skills that make great all-grain brewers.
Here's your action plan:
- This week: Order your starter kit (I recommend the Northern Brewer Essential) and your first ingredient kit (American Pale Ale or Amber Ale).
- While waiting for delivery: Read through this guide again. Watch a couple of extract brewing videos on YouTube. Clean and organize your brewing space.
- When your kit arrives: Read the included instructions completely before brew day. Gather any additional items (large pot, kitchen towels, a notebook).
- Brew day: Don't rush. Follow the steps methodically. Take notes on everything - times, temperatures, observations. This is your learning log.
- During fermentation: Resist the urge to open the fermenter. Trust the process. Keep temperature stable.
- Bottling day: Verify gravity is stable. Sanitize everything. Be patient with bottling - rushing leads to oxidation.
- Conditioning: Wait the full 2 weeks minimum. Taste one bottle at week 2, then one per week. Notice how the beer improves with time.
Welcome to the homebrewing hobby. I guarantee that cracking open your first bottle of homebrew - beer you made with your own hands, from grain to glass - will be one of the most satisfying moments of your year. And from there? The rabbit hole goes as deep as you want it to.
📬 Stay Connected with BarCarrera
Get weekly brewing tips, exclusive recipes, and gear reviews delivered to your inbox. Join 25,000+ homebrewers who trust BarCarrera for honest, experience-based guidance.
No spam, ever. Unsubscribe anytime.
Last Updated:
Originally Published: September 15, 2025
Fact-Checked: Information verified against AHA guidelines, BYO Magazine references, and current product availability as of publication date.